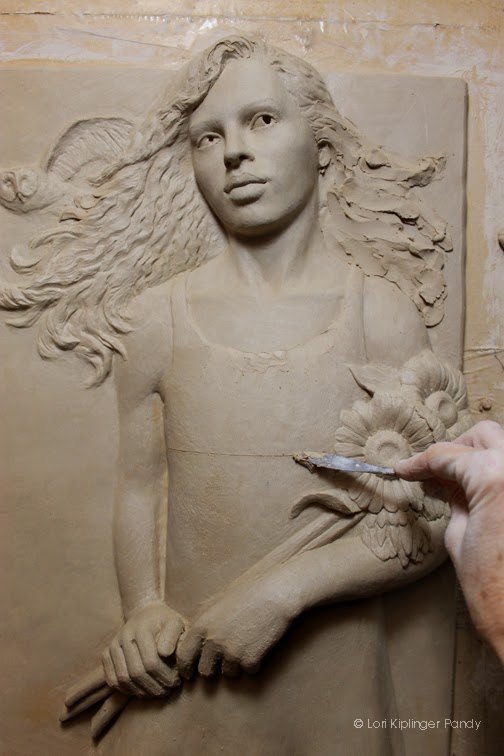
The sculpture is complete and ready for the mold. I am using
Polytek's Poly 74-20 to make the mold. The sculpture is a high relief measuring 18"x 24" x 3" and took nearly all of the
small 6lb kit of rubber. Since
this is a fairly large and high relief I opted not to do a poured block
mold. The block mold would have been easier and faster to make would
would wasted a lot of mold rubber. A blanket mold would have worked too
but I opted for a brush-on mold with a mother-mold shell instead.
This
kit contains one container of A and two containers of B. You must stir B
very well prior to mixing and directions state that use of a gram scale
is recommended. You can get away with volume measurements if very
precise but weight measuring is more reliable. In my case, I didn't have
a gram scale so I used a postal meter scale which is good enough.
Be I measured the weight of the empty cup and deducted it from the weights of the rubber when measuring.
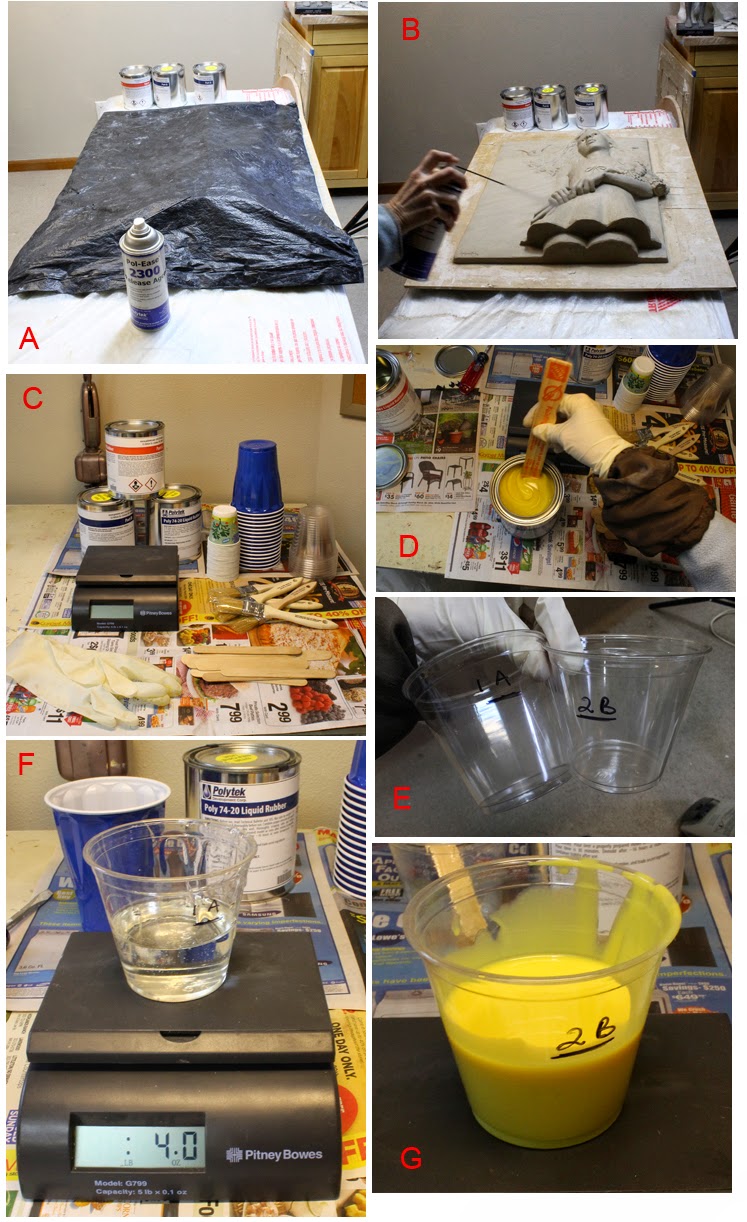
Here is a breakdown of steps by photos. Note that I have a few larger detail photos at the bottom:
A)
Cover your work area. This is messy and does have an odor. I set things
up on a covered table and assembled necessary items - the sculpt is
under plastic.
B) Spray two light coats of
Release Agent over the sculpt and the support board.
C) Set up supplies: scale, rubber, plastic cups, chip brushe, stirring sticks - newspaper to catch drips.
D) Stir part B well.
E) I marked two cups with A and B and resued them when measuring out the two ingredients.
F) Weighing out Part A
G) Weighing out Part B - I was sure to wipe any drips off scale.
H) Pour 1 part A and 2 parts B into larger cup
I) With clean stick mix and stir mixture well.
J)
Using disposable chip brush, begin brushing light print coat onto the
sculpture. I will be working in sections - mixing new batches as I go.
Brush carefully and try not to make any air bubbles. This is a very thin
mixture that isn't prone to bubbling, making a good print coat to catch
all the details. Don't worry that it is thin and running off the high
points - you will ad more later. Most important is a thin layer all
over.
K) Continue mixing up more rubber and cover entire sculpt including a minimum 2" flange around the sculpture on the board.
L)
Once the first coat of rubber is on, test with your gloved finger to
see when it is ready for the next coat. If the rubber stick to your
glove and pulls up it not ready and you would ruin the print coat if you
tried to apply more rubber - wait a bit more and test again - the
rubber should be tacky and leave a light imprint but should NOT pull up
with your glove (detailed photos at bottom)
M) Continue to meaure
out 1 Part A to 2 Parts B and mixing in a fresh larger container with a
fresh stick and apply additional coats of rubber to the sculpt. The
tendency will be for the rubber to slip off high points and pool in
lower areas so the low areas will build up quickly. Contentrate on the
high areas now.
N) As this rubber is meant more for poured bock molds, it stays quite thin. You can thicken the mixure using
cabosil or short stuff. This rubber can be poured as supplied or thickened with
Poly Fiber II or
Fumed Silica for brushing.
N) I had short stuff on hand so this is what I used.
O)
I pour small amounts of short stuff into my mixed rubber and stir well.
I'm looking to make a stiffer consistency to build up the higher areas
and begin to fill in any undercuts.
P) The mold rubber needs to build up to 1/4" to 3/8" to be sturdy enough for repeated use.
Q)
I continue make the each batch of rubber thicker with more short stuff
and use a mixing stick instead of brush to build up and fill in all
undercuts.
R) I fill a
plastic key molding
tray with additional rubber and let it set up. With another coat of
rubber, I demold the keys from the try and imbed them in fresh rubber on
the flange to help key the rubber mold into the mother mold later.
S)
From set up to final coat of rubber is about 6 hours with curing
between coats. I've used about 12 stirring sticks, 10 disposable
brushes, and 12-15 cups. I used 90% of the rubber in the kit. After
letting the rubber cure overnight I come back and cut the excess off the
flange.
T) Peeling back the rubber allows me to check that it is releasing well and that the print coat picked up all the detail.
The
mold is complete but I must leave it intact with the clay sculpture
still inside becuase I will now need to make a rigid mother mold to
nestle the rubber into. The rubber is floppy and pliable - you need a
firm shell to hold the shape when casting. The reason that I needed to
build up those undercuts is so that the mold will pull out of the rigid
shell.
Next up will be the Mother Mold tutorial.
 Colorado is an area with some extreme weather and temperature changes. Last week we had temps near 70 degrees, almost record-setting for mid to late December.


