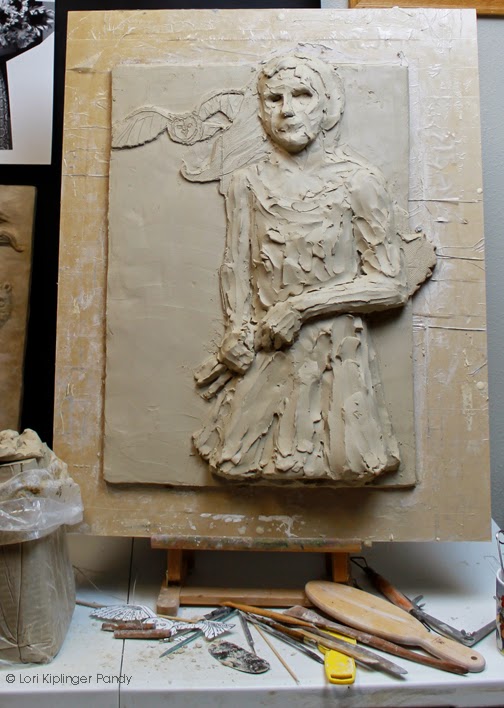
 Now that the clay is on the board and set upright on the easel and the image has been drawn onto the clay, it's time to start adding volume and mass to to image.
I begin by quickly blocking in the shapes - not trying to accuracy or likeness at this point - simply bring up the shapes to the highest point (in this case, the time of the nose and bottom of the skirt).
Always keep structure and anatomy in mind while you are working. Think in terms of bone and muscle. I'm not worried about surface features at all at this point - there will be time for that later.
Try not to become fixated on any part of the image. It's a trap to spend a lot of time working on face and neglecting other areas of the sculpture. Trust me, it never works out and when you finally do bring the rest of the sculpture up to the same level of finish as the face you'll find terrible problems with anatomy and distortion.
That said - I do begin with the face and keep coming back to it, as that sets the tone and emotion of the entire work.
As I said in Part 2, the drawing is going to be obliterated once you begin the actual sculpting. Clay is fluid - it moves while you work and you should never be afraid of cutting a sculpture apart and making changes as needed.
I decided that sculpt needed more tilt and attitude to the head, so I simply took a wire cutter, looped it under her chin and sliced her face off. Easy Peasy

Once her face was removed, I simply tilted the angle a bit and re-attched the face and reworked the neck. Then I set about roughing in more of the anatomy and continued to build up forms.


Bravo.
ReplyDeleteThanks, Agnes!
ReplyDeleteI’m getting prepared to do a bad relief , love them. Your article came at the PERFECT TIME. Although I knew what to do and have done bad relief ( sorry auto correct probs) your tutorial was excellent and inspired me to start mine…FINALLY lol so thank you AND your work is beautiful
ReplyDelete